I've recently started getting into using off camera lighting and learning about lighting in general. It's really stepped my game up 100%.
I started off with a strobist kit from Midwest Photo Exchange, after reading up on the strobist blog. For as little as $215, you can pick up a flash, light stand, umbrella, wireless triggers, and other goodies like light gels, DIY snoot kit, etc...
The knowledge is mostly free. The Strobist Blog has been the biggest inspiration in learning about lighting.
I also picked up Light Science and Magic, Third ed. at a local photography store for a bit cheaper than the list price. This is a book that describes the theory behind lighting certain scenes and objects and how to go about correcting problems you may have. It's not a guide on what setting you need for your camera and flash and how far away to place your lights. The authors' goal is to make it so you can do this on your own without having to memorize their diagrams and light setups.
Jumping back to the hardware; there's several different choices you have to make that will influence price, reliability, and which combination of gear you're going to be purchasing. The first thing to consider for off camera lighting is how you want to trigger your flash.
[b]Sync Cords[/b]
You can go cheap and purchase a sync cord, which runs from your camera to your flash. The up side is reliability and cost. It should work every single time and not cost an arm and a leg. The down side is flexibility and range. Being tethered to your flash and only having a short range will not allow you to get certain shots and may have you tripping over your own cables if you're clumsy like me.
[b]E-Bay Triggers[/b]
The cheapest wireless options are the "e-bay" triggers. The most popular are the Gadget Infinity, Cactus V2S wireless trigger system. Most of these can be had for about $30 a set. They come with one transmitter and one receiver. The down side of these are reliability, range, and possibly the batter depending on what brand you choose. Most will misfire. This is a fact and not opinion. They won't do it 100% of the time, but radio interference and being in a busy part of a city as opposed to away from a lot of interference can influence how many misfires occur. The stock range on these is about 100 ft., if I remember correctly and the battery on the Cactus triggers are a CR2. These can be expensive. They go for about $10 a piece at your local store, but can be had for less than $2.50 each if bought on line.
The one thing about the e-bay triggers are that you can mod them fairly easily and for $30, if you happen to break one, it’s no big deal. There’s two mods that a lot of people are doing to their Cactus triggers. The first is an antenna mod. It consist of opening the case of the transmitter and soldering a 433mhz antenna to the board, then drilling a hole and running it through the top of the case. This mod has been shown to increase reliability and range on the triggers. The second mod consist of soldering connections in the receiver for an external battery pack that takes AA batteries. This helps alleviate the cost of batteries for the triggers.
[b]Elinchrom Skyports[/b]
The next set of triggers are the Skyports, made by Elinchrom. These are more expensive than the E-Bay triggers, running about $180-$190 a set. The transmitter and receivers are fairly small and by all reports, are very reliable an have a fairly long range. I have not used these, but everyone I know who has, really likes them. The transmitter that sits on the camera’s hot shoe has an internal rechargeable battery, like an iPod. The down side to this is that if you forget to charge your battery and get stuck at a shoot with no electrical outlets, then you’re SOL. The battery is supposed to last a long time though, so as long as you don’t forget, you’re golden. The other down side of the Skyports is that they currently will not work with the Vivitar 285HV, the flash sold in the MPEX Strobist kits. Elinchrom has already stated that they’re working on an updated version that should be out shortly that will work with the Vivitar flash.
[b]Pocket Wizards[/b]
The last set of triggers that I’m going to talk about are the Pocket Wizards. They’re considered the best out there by most people. They have exemplary reliability and a range of up to 1600’ in perfect conditions (which we know, conditions are never perfect). The down side? $180-$190 for one transceiver, meaning about $360-$380 for a set. The up side? These devices are transceivers. They transmit and receive. You can use the same unit that you used on your camera to trigger a flash. They can also trigger your camera. They’re solidly constructed and so far have proven to be one of the best purchases I’ve made for my photo kit. If you’re serious about photography and have the money, don’t hesitate to buy these. If you don’t want to spend the money or don’t know how serious you are about learning about off camera lighting, then the other options listed above are perfectly fine.
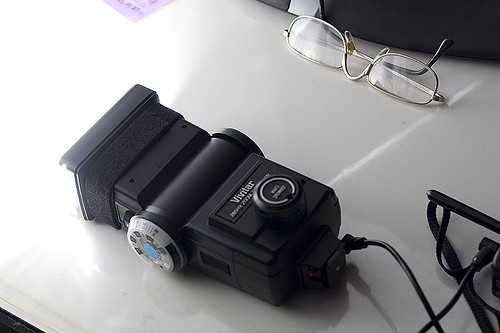
Now I’m going to discuss the next important part of putting together a kit for off camera lighting; the flash.
There’s really two main types of flashes to consider, a fully manual flash, or a flash with TTL capabilities. Keep in mind, that in most circumstances, once a flash is removed from a camera and fired via a radio trigger, that the flash loses all TTL capability. Regardless of which way you go, you want to make sure that your flash can operate in full manual mode. Having a TTL flash that will not operate manually will not let you use it with radio triggers.
The pluses of TTL flashes are that they can be used on camera. If you ever need a flash to just shoot with, you can pop it on your hot shoe and you’re good to go. Something like the Canon 580 EX II or the Nikon SB-800 will let you use it as a normal on camera speed light or as a manually triggered off camera flash. The down side to the TTL flashes are that they’re normally more expensive. You also have to make sure that the flash has a way to be triggered by your triggers. The Cactus triggers work via hot shoe so will work with most flashes, while the Skyports and PW’s use a cable. A flash like the Canon 430EX does not have a sync port, so would require a miniphone to hot shoe cable to work.
The next type of flash is the full manual flashes. These are flashes that operate manually and do not have TTL control. They’re usually a lot cheaper, with most running under $100 for one. The down side to these flashes is that once you put them on your cameras hot shoe, you still have to manually set the power and focal length on the flash and they won’t interact with your camera like a typical TTL flash. If you’re planning on really getting into off camera lighting though, these flashes are a good buy, as most the time they’ll be spending off camera and connected to a radio trigger, which means even a TTL flash would be operated manually.
That’s it for now. I’ll probably get around to adding more later, but my fingers are tired…
Links:
The Strobist Blog
Midwest Photoexchange Strobist info/kits
Light Science and Magic 3rd Ed.
Gadget Infinitry - maker of the Cactus V2S wireless triggers.
Pocket Wizards
Elinchrom - maker of the skyport wireless triggers.
Friday, January 4, 2008
A Beginner's Guide to Off Camera Lighting
Tuesday, December 11, 2007
Successfully eviscerating a meet up.

To write. I think that's it. I did promise the "Beginner's Guide to Selecting a Digital Single Reflex Lens Camera". I'll be working on that very soon, I swear. I've been busy with trying to work out two paid shoots (Yes! Real money!) and they haven't been going well so far. Any ways, those are stories for another time.
The Capital Photography sponsored Strobist lighting workshop is coming up quick, this weekend in fact. So far the weather looks to be some what cooperating, except with the fact that the forecast only calls for a high of 41 degrees. Poor, poor, modeling victims. We have 12 people lined up so far, a place to meet and places to shoot at. Follow the link below to see the blood and guts of successfully organizing a meet(read: organizing, not running).
That's about it. Not bad from writing off the top of my head I guess. Now, hopefully the meet up this Saturday will work out smoothly and go as planned. I know that's probably not the case, but we can always hope for the best.
Wednesday, November 21, 2007
Happy Thanksgiving
Happy Thanksgiving to those that celebrate it. Happy Thursday to those that don't. I may be away until Tuesday, but I'll try and get my "Beginner's Guide to a DSLR Purchase" together and posted some time before then.
Tuesday, November 20, 2007
Workshop Update
 So last Monday I called the Corporation of Shepherdstown (their city government) and asked if there were any restrictions as far as photography with light stands go. I was told that the clerk would check and get back to me in about an hour. So I called back. Now I was told that I needed to e-mail the clerk the information about where we wanted to shoot and what we were planning for the day. So I did that.
Eventually it turned into this whole mess of how she, the town clerk, needed to get with the mayor to have this approved. In the back of my mind I was wondering what we truly needed approval for and how bad was this going to get. After all, the Shepherdstown locations we were wanting to shoot at were all considered to be in public view. If we were denied, would this indeed be a challenge to the right of photographers?
Any ways, on with the story. The Shepherdstown clerk called me back the next day, maybe it was the day after next, and told me she needed the group name and any credentials. I sent her an e-mail telling her that technically, we're not a specific group or club and we just met and started arranging this via a Flickr group. We don't have specific credentials as a group. I also asked why she needed this information. My response was along the lines of "The mayor has had problems with photographers in the past". So who's this almighty mayor to impose and bend laws at his will based on an experience with another group of people who share the same hobby? I mean, there are often motorcycles, primarily Harley's and Custom choppers that will sit outside shops and rev their engines for two or three minutes, then tear off rattling all their windows with their straight pipe exhaust. My bike's exhaust is unnecessarily loud, but I don't sit outside shops and rev my engine. I start my bike and go and two minutes is a long time if some one's constantly toying with a vehicle capable of producing that many decibels that it makes your teeth rattle. And despite the loud noise and the complaints and the bad experiences with that group of people, there's no magic law that prevents them from being able to ride into and out of town.
Enough with the rambling...
Well, about four days had passed since the initial call. Remember the first workshop post and my rant about Harpers Ferry? Well it seems that they've had a change of mind. I received a letter in the mail for a self guided tour of 16 photographers with no mention of needing a permit. But I held out.
Finally on Monday, one week later, I found a voicemail on my phone saying that the photography was approved and we could go ahead with the meet. Talk about politics moving slow. So we're good to go. I have this whole great organized idea planned and I'm hoping it turns out great. After my partial dissatisfaction with the Patapsco meet(sorry to everyone that helped plan the Patapsco meet. It was extremely fun and I learned a lot, but it was chaotic and I felt bad that it seemed like certain people didn't get an equal chance at trying out new things...at least on our side of the river.), I really want to do something fun and organized that will turn out to be a great experience to everyone that attends, not just those with all the equipment to do this.
Oh, and I hope no one thinks I'm being a Nazi because of the whole organization thing. I appreciate organization in certain things in my life, definitely no my computer desk or my programming works, but definitely for things that involve groups of people and their satisfaction.
Monday, November 19, 2007
Once a Photographer, Always a Photographer
 Yet another posting that doesn't have much to do with the technical merits of photography. I'll get to those later.
Any who, this weekend I was invited to a "co-ed" baby shower for a friend of a friend. This wasn't a normal baby shower. This baby shower involved alcohol and strip club employees. Good people, no matter what visions you may now have in your head.
I got there a little late, like an hour late. I just finished rapping up a marathon recording session of over fourteen hours, twelve of those being in one day. So I trudged in, tired and cranky with beer in hand (The new Magic Hat seasonal brew has too many hops in it, by the way). I sat down and after a smoke break for several people, the fun commenced. Out came the games and the disposable film cameras. Of course,the friend who invited me knows that I keep my camera with me most of the time and the first thing I hear after sitting down is "Will! Go get your camera and take pictures for us".
Of course I obliged and retrieved my camera from my car and snapped off a couple of shots for the mom to be.
But at one point in the evening I was wondering when they would be taking the photographer for granted. I'm leaning more and more towards working on technique so I feel comfortable charging people for photos and portraits. I've also received two job offers that I've accepted: one is a photo shoot for a local tattoo shop's crew and another for the album artwork of an artist that records at my studio (shameless self promotion: 1080 FCS). I figure if I keep going, the job offers will keep coming in and I may actually make something out of this.
This leaves a dilema. When I'm hitting the big leagues (in my mind anyways) and making $100 an hour to do events or whatever else, when do I say no for favors? I wouldn't charge my friends for something like the baby shower or party pictures as I like photography. It's not 100% a business for me and I hope it never becomes that way. But when other people want to ask for favors in the futures, I'll have it in the back of my mind that they're getting a hell of a deal.
Today's post is poorly written. I'd like to say I'm still up after 24 hours and typing by the power of coffee and cigarettes, but it's Monday morning. The coffee is all gone by the time I get to work, I don't smoke cigarettes, and I did wake up about 2 hours ago. I'm just tired. No more staying up late and drinking on workdays.
Thursday, November 15, 2007
We are the Sum of All Our Parts

I'm getting philosophical, huh? I was thinking about going back to school, entirely ditching the Computer Science approach that I used to be so interested in and going with.....suspense....can you guess? Photography! It's something I've been into since my 35mm SLR days in High School. With the emergence of digital and the huge price tag, I just kind of fell off for a while. Since I got a good job and the means to pay for new gear, I picked up right where I left off and have been going ever since.
What got me thinking about the whole going back to college thing and the blog title is that photographers don't need to go to school for anything. Our hobby/profession is one that any one can pick up a camera and start dabbling in, and depending on their level of creativity and aptitude, become amazing at what they do.
The problem then becomes knowing what to do with your talent. As I have read many, many times from many, many sources is that the photography profession is 80% business and 20% photography. I know you have to have an eye for it and natural talent can take you a long ways, but if you have amazing pictures that go no farther than your computer, you've only accomplished part of this great hobby.
So with the knowledge I do have, I think I'm ready to take the jump of ditching the idea of having some big pay 9-5 IT position and do what I've always been really good at, doing things my way. It's time to pick up the rest of what I need to become a successful photographer in the business world
Wednesday, November 14, 2007
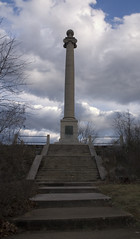
No Photographers Allowed
So the hands of beuracracy and paranoia are at it again. If you notice the picture to the left you'll see the monument that was built to honor our first president. The one who helped to establish this country that was founded on the principals of democracy and freedom.
Of course, as time have changed so have our ideas and our fears. Today it's nearly impossible for a person with a camera not to get a dirty look or two from some one that thinks they're a pervert that wants pictures of little kids. It's hard not to get stopped in public and harrassed by the authorities; hald the time those authorities are all for violating your rights if you don't know them and don't stand up for yourself.
I know this may sound like nay saying to some, but it can be the truth. We engage in this hobby we all love and we're proud of it. We're not some pedophile or terrorist slinking around in the shadows trying to plan our next victim or target. We're people who like capturing the essence of a moment in time in pictures and sharing it with the rest of the world.
I'm not going to go too long on this rant, but I'll leave everyone with some helpful links that they should visit. And on a parting note, if you ever get stopped and harrassed, remember that you have rights too.
Bert P. Krages II Attorney At Law Photographer's Right PDF
DC Photo Rights - Flickr Group
"The War on Photographers" - PopPhoto.com article
Just Google Photographer's Right's and you'll come up with a ton of material to look through. Have fun, stay safe, and stay out of jail.
Monday, November 12, 2007
A Beginner's Guide to Manual Mode
Something that I hear a lot from new users is that they’re going to stick to the green box mode until they learn enough to operate the manual settings. This is something I disagree with and think that all new users should experiment with their DLSRs manual settings as most shutters are rated by manufactures to last at least 50,000 actuations and you can always chimp and erase; there’s no worries about wasting film and you can see the results immediately.
What should I know about the big M?
There are several very important things that a photographer must know about. I won’t cover this in depth in this tutorial as the discussion and arguments that can arise from the topics can be rather lengthy. Since this is the case, I’m only going to touch on them separately before attempting to explain how they relate to each other when controlling each parameter individually.
Exposure
In photography, exposure is the total amount of light allowed to fall on the photographic medium (photographic film or image sensor) during the process of taking a photograph
-Wikipedia
The exposure is what controls how light or dark a photograph is. The longer the exposure to light, the brighter the photograph; the lesser the medium is exposed (in this case the camera’s sensor), the darker the photograph.
ISO
The first one is ISO. It directly affects the pictures you take and the exposures that crop up from the rest of the settings. ISO stands for International Organization for Standardization ( http://photonotes.org/cgi-bin/search.pl?input=iso&which=d ). The ISO was originally for film speed and dictated the sensitivity to light that a film had, with the lower the number being the slowest and the higher being the fastest. The lower ISO rated film also contained less grain and would yield better quality pictures.
Most entry level DSLRs have an ISO setting that ranges from 100-1600, with higher end models going as high as 6400 ISO. Several different models contain auto ISO settings and can adjust this on the fly. I prefer to do it myself. The ISO setting works like the film ratings, but can be changed in camera. The lower the ISO setting, the faster your shutter speed will have to be to compensate for the slow film like effect. Also, the lower the ISO setting is at, the lesser the amount of grain that will be evident in the photos, yielding a better quality picture. On the other hand, a higher ISO setting emulates faster film allowing you to get brighter exposures with a slower shutter speed. Using a faster ISO setting will create grain in the photo though, with sometimes extreme amounts at higher ISO. The grain will be more noticeable in areas of the photo that are black and underexposed.
So when setting your ISO, you’ll want to use higher settings for darker atmospheres where you can’t use a faster shutter speed, but balance it out so that your photos don’t turn out too grainy. In doors and around low ambient light, I usually try and go no higher than ISO 800 unless I have to.
Shutter Speed
Shutter speed’s basic definition is pretty straight forward. It’s the duration of time in which the shutter remains open. Having a slower shutter speed will allow more light in for a brighter exposure; having a faster shutter speed will let less light in and will create a darker exposure. The duration of a shutter speed will also affect blur from camera shake and the motion of a subject. If you’re photographing a moving subject and have a slow enough shutter speed, you will get a photo of the subject from the point when the shutter first opens to the point when it closes. This can create some neat effects, but is usually not the desired result of taking a photo. Also, a slower shutter speed while hand holding a camera can cause everything to appear blurry from the inability of a human hand to hold the camera perfectly still.
Usually the guideline for the slowest shutter speed allowed when hand holding a camera is 1/focal length. So if you’re using a 50mm lens, 1/50 is generally accepted as the slowest shutter speed possible before camera shake starts to become an issue.
Aperture
Aperture is the hole or opening through which light is admitted. In our lenses, it’s the set of blades that can be adjusted to allow light through. Aperture does many things, like controlling the DOF (Depth Of Field) as well as the exposure. The number of blades can also shape the way the out of focus area looks when using a shallow DOF. Apertures can range from 1.0 to 32. They are designated by a f/(aperture number). The lower the aperture equals the wider it can open and let light in. This also causes a shallow DOF as it uses the whole lens as opposed to just a portion of the center. Generally lenses with a larger maximum aperture (lower number) cost quite a bit more than those with smaller maximum apertures.
The Light Meter
All new DSLRs should have a light meter. It should be viewable in the bottom part of the viewfinder. When pressing half way down on the shutter button to focus, the meter should come up with a tick above it, indicating the exposure that the camera is reading. Most entry level cameras will just take a general reading where the higher level models will let you set which part of the view finder you wish to meter off of. The meter should have three numbers, a 0, a 1, and a 2. Those usually have two ticks between them. Each number is a full stop of exposure. There will be a -1 and a +1 as well as a -2 and a +2. This means that if the tick telling the exposure is hovering above the -1, that the photograph will be underexposed by one stop; +1 means that the photograph will be overexposed by one stop.
Using This All Together
Now with the little bit of information provided, you should be ready to start experimenting with the manual control on your camera.
With your ISO set at an appropriate range (outdoors should be ISO 100 and indoors about ISO 640) you want to set you aperture. Generally speaking, 5.6 is a good aperture that will allow you to take a photo of a subject without having too shallow of a DOF and will let you have the majority of it in focus. While having your camera pointed at the subject, press the shutter button half way down. The light meter should appear with the tick telling you what the exposure should be hovering somewhere above. If it’s to the left, over the negative numbers, it means that the current reading shows as under exposed and the shutter speed needs to be lowered to compensate. Conversely, if it’s hanging over the positive numbers, the reading is that the photograph will be overexposed and the shutter speed needs to be faster to compensate.
When the shutter speed is set correctly, the tick on the meter should hover over the center, which should a zero. This meter reading is showing that if you take the current picture, it will be properly exposed for the ISO and aperture settings you use.
If you’re indoors and your shutter speed drops below the generally accepted minimum, you can either raise the ISO or widen the aperture. Keep in mind that some cameras will produce considerable amounts of grain at higher ISO’s and too wide of an aperture can cause a very shallow DOF, which can be a cool effect, but can also provide the undesired characteristic of having focus placed on the wrong area of the photograph.
In conclusion, this little bit of information should be enough to get most beginners on their way to using the manual mode of their camera. The manual mode offers greater control over your photos and unlike the Green Box mode on many cameras, will allow the user to start delving into the world of the RAW file format. That, is a whole ‘nother ballgame there and will be covered in a future tutorial. Until then, don’t be afraid to experiment with your camera’s manual mode and have fun doing it.
Friday, November 9, 2007
The Insignificant, Cheap Flash Mod
Thursday, November 8, 2007
Putting the "Work", in Workshop
OK, that was a little irritating, but I'd do what I have to. The latest voice mail on my phone told me that I needed to fill out the permit request form and turn it in with a check for $50 for the filing fee, which was non-refundable of course. It also said that for a group of 16, we would be required to pay a $150 location fee for the permit. That was another irritation, but Harpers Ferry seemed worth it. So according to the directions on my voice mail, I looked up the permit form on the website. WHOA! In bright red text no less. So there was a good chance that I would turn in the permit with the filing fee and never hear from them again. I figured I should call just in case...oh, and I had questions about why they needed my company name (don't have a company), tax id # (ditto), project manager's name (and again), catering company's info (and again), and a host of other non related things. So a phone call later and I learn that if I would have turned it in on 11/7, I may have heard back from them by the 15th of December. No guarantees, mind you. The woman on the other end explained that she has to receive the permit request form and them drop it off at the adminsitration office. The permit request then has to be viewed by seven people and approved by each. It really sounds like a good way to take $50 from some one if you don't feel like doing the work at the time; it also sounds like Harpers Ferry doesn't like to deal with anything out of the routine, even if it can be good for business. After that hassle, I just said forget it, we'll find a place to host the event that wants us there. So now I'm thinking on Shepherdstown, WV. It's still close to Harpers Ferry and has some very good locations for photography. It's also close to other accomodations for those that don't want to drive too far and it's not in the middle of no where. So here's to hoping it all works out, atleast for the sake of my sanity.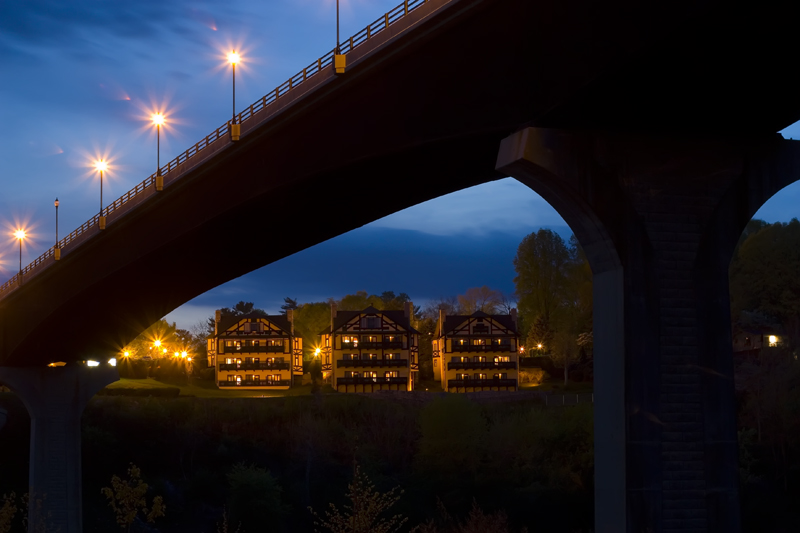
So one of my goals for Capital Photography was to host photography related workshops and classes for people, providing our members and other people in the community a chance to learn from professionals and each other. Who knew it was going to be so much work?
My intentions for the first one kind of developed over the past week and yesterday I really got into gear and started arranging everything I possibly could ahead of time. The three biggest concerns of mine were location, models and certainly not least of all, organization.
I started with the models here. Fortunately I have some very good friends who were willing to do the job; throw in the offer of money and it was a definite. So in two test messages I took care of most of the modeling arrangement.
Next was the location. The original intention was to hold the event in Harpers Ferry. It's large, has a ton of scenery, and would probably not be crowded with it being the off season. This is where the trouble started. I called the number on their website to enquire about rates and I was informed that I may need a special use permit. That's fine, we could swing the fee for the location if we absolutely had to. Well one phone call led to another and it was finally confirmed that we needed a commercial film/still photography permit even though:
Wednesday, November 7, 2007
UE - The Legal Way

Anyways, I met up with my assistant and we headed out to the location. We met the realestate coordinator for the location and she let us in. We headed up to the third floor and crossed through one large section of the mill, the wooden floor boards creaking and shifting the whole way. After we crossed into another large section, the coordinator told us she had business to attend to and would be back later. No big deal, we'd still be there.
This gave me and my assistant time to look around and snap some shots. We ventured up to the fourth floor and were happily snapping away about the time that the coordinator came back. We took about another half and hour or so and toured the inside of the mill, getting some good shots along the way. Before the coordinator left, she let us into the court yard and gave us free run of the place, just telling us to make sure we locked up when we left.
We took about another 45 minutes firing off shots and exploring other builiding in the courtyard before heading out.
I'm planning on putting together a series of the building and architecture from around the area and possible putting them on display. I'm thanking the coordinator for her time by providing her company with a set of the photos I took.
Strobist Meet @ Patapsco State Park 11/3/07
That morning I woke up bright and early at 6:43 AM, grabbed a quick shower, a full tank of gas, Jeff Slater, and our modeling victim Desiree Shaffer. One important detail I don't want to forget is that made a pit stop at McDonald's in Brunswick. If you know what's good for you and value your time, don't go there. It's one of the only fast food restaurants in town and everyone goes there on a Saturday morning. It was packed. We managed to squeeze in and pig out without wasting too much time, but it was close.
After the pit stop we continued on our way. We reached Patapsco state park at almost exactly 10:00 AM and passed by the group of people with a ton of camera gear waiting on the side of the road. That was our group. Me and Jeff gathered our gear and I made Desiree carry tripods and light stands. We headed over to the group and introduced ourselves, receiving name tags. After a short wait, David Hobby, the creator of the Strobist, walked up carrying a giant _____________. Oh right. I'm not allowed to tell until he post up. Needless to say it was a very creative way to blow a pocket full of dollars and everyone that appreciates his work and the DIY projects will go out and get one of these.
After the short talk with David we split up. I went with Des and several other people to the other side of the river to the foundation of an old mill. That was out first location. After a minute of millin' (pardon the pun) around, we kind of got things rolling.
No one new what was going on. Most of us were under the impression that once we got there, there would be people experienced in the strobist technique and could give us all tips and pointers. That wasn't the case. Eventually we ended up with light stands scattered apart and snapping photos, tentatively giving Des direction. Everyone was still a little shy at this point.
After shooting around a bit, we packed up and moved down the hill back to the bridge. Things were starting to warm up and we were getting better at the giving order things. Another half a gig wasted on the memory cards and we moved on again.
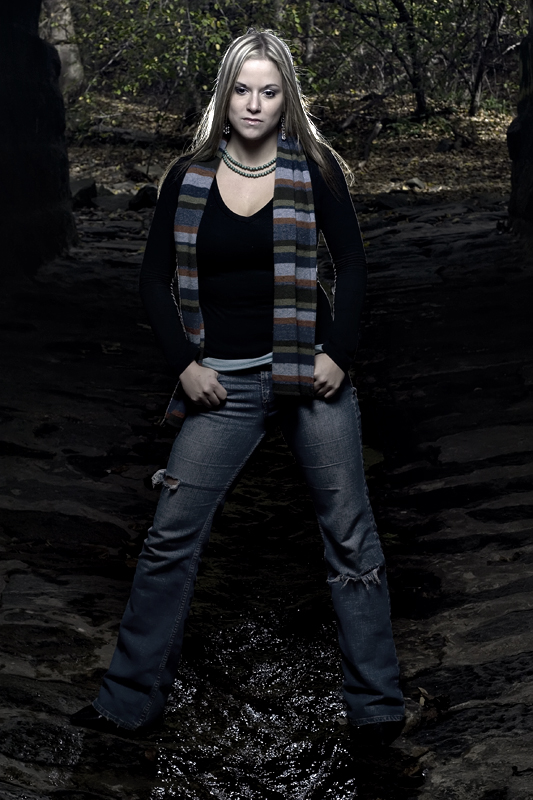
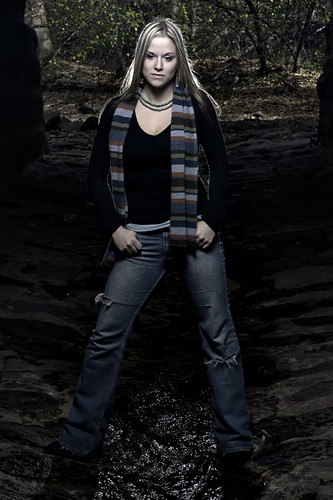
Those two locations were OK for me, but the next is where the fun started. One of the guys told our group of a tunnel about a mile down the path. So everyone headed that way. He exaggerated a bit as it was only about a five minute walk. It was worth it though. It's a large tunnel that acts as drainage and runs beneath the railroad tracks. People were already shooting a man and his two children. He was just a passerby, but he ended up having some great family portraits taken by some good photographers. We got to the tunnel mouth about the time the family was getting ready to take off. The rest of us unloaded and we started taking even more shots of Desiree.
After what seemed to be another thousand pictures, we had her stand in the middle of the tunnel for an idea I had. I setup my Vivitar 285HV directly behind her with no diffusion, and one of the other photographer's Nikon SB-600 on a light stand with a shoot through umbrella, above her and to my left. That was where I got one of my best photos of the day.
There were about fifteen photographers in the tunnel trying to get pictures. We almost had two mishaps. The Nikon on the light stand almost tipped and was caught and another person's flash on light stand with and umbrella fell, just dipping the umbrella in the water and almost getting the flash. Oh, and the guy almost dropped his camera while trying to catch it. Des saved the day by grabbing the umbrella and allowing the guy to get everything stable. Crisis Averted.
After we wrapped up there, we decided to head home as it was already 1 PM and I needed to make a stop in Northern Baltimore. If turned out to be a very fun, but chaotic event and I did manage to learn a lot from the critique of others from my finished photos.
